倉庫/海外Site翻訳/NifTools/ChangeTexture
NifSkope/Change texture † 
This is a tutorial that teaches you how to use NifSkope to change the textures stored in NIF files. Some games don't store their textures in the NIF file, but most do and this will allow you to change them and create a new NIF file with different textures for those games.
Open the NIF file † 
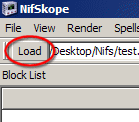
- First you need to open your NIF file. You can do this by choosing File > Load from the menu or clicking the Load button and browsing for the file you want to open.
#ref(): File not found: "Nifskope_load_menu.gif" at page "倉庫/海外Site翻訳/NifTools/ChangeTexture"
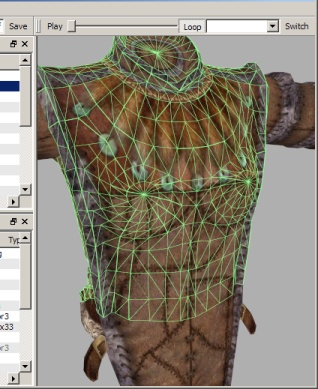
- If all goes well, you should now see your 3D model in the render window.
#ref(): File not found: "Nifskope_change_texture1.jpg" at page "倉庫/海外Site翻訳/NifTools/ChangeTexture"
If you can't see any textures, make sure you have your texture directories set properly. You might also look under the Render menu and make sure Texturing is checked. Remember also, some games like DAOC often don't store the textures in the NIF file. Instead the game engine adds them. So it may not be possible to change the textures in these games using NifSkope.
If you can't see anything at all, make sure Render > Hide non textured is not checked and try zooming in and out and moving the camera around to try to see if the mesh is just somewhere outside the view area.
Select the Shape † 
NIF files can contain more than one 3D shape, and more than one texture. You need to find the one that you want to change. There are two ways to do this; graphically or by finding it in the list.
Graphically † 
- Move, zoom, and rotate the 3D view so that you can see the area you want to re-texture and click it. If you don't understand how, read about the render window camera controls. You will see the shape you clicked become highlighted by a green wireframe. If you have selected the wrong area, just try again until you find the spot you want.
- When you highlighted the object in the 3D view, the geometry object that defines it was also automatically highlighted in the Block List window on the left.
#ref(): File not found: "Nifskope_change_texture3.jpg" at page "倉庫/海外Site翻訳/NifTools/ChangeTexture"
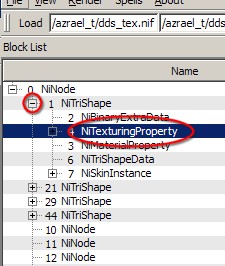
- This should be either a NiTriShape or a NiTriStrips object. Click the [+] icon on the left side of it; several sub-objects will appear.
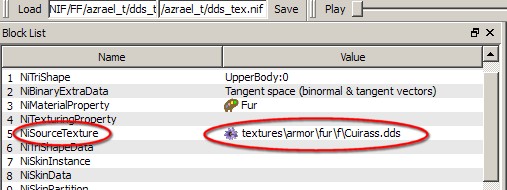
- One of these sub-objects will be a NiTexturingProperty object. Click the [+] icon to the left of this NiTexturingProperty block to expose its NiSourceTexture object. This is the one you have been looking for and will have a purple flower icon across from it in the Value column.
#ref(): File not found: "Nifskope_change_texture5.jpg" at page "倉庫/海外Site翻訳/NifTools/ChangeTexture"
Note that some objects may have more than one of these. The first one will usually be the "base" or "color" texture... that's the standard texture that you probably want to change. The following ones could be other types of textures like glow maps, gloss maps, etc. You can also change these using the same methods if you want, but usually it will be the first one you want to change.
Now continue on to the section about changing the texture file name.
Finding the Texture in the List † 
If you know the name of the texture you want to change, you can try to find it in the list rather than searching for it graphically.
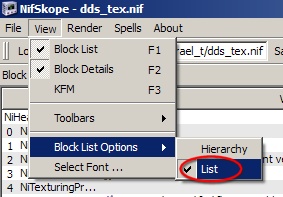
- First, turn on list display by choosing View > Block List Options > List
- The Block List window now shows a list of every object in the NIF file. NiSourceTexture objects hold the texturing information. They are easy to spot in the list because they have a purple flower icon. Scroll up and down the list until you see the texture you want to change in the Value column.
Change the Texture Filename † 
Now that you have located the NiSourceTexture object that contains your texture, either graphically or by finding it in the list, you can now change the texture.
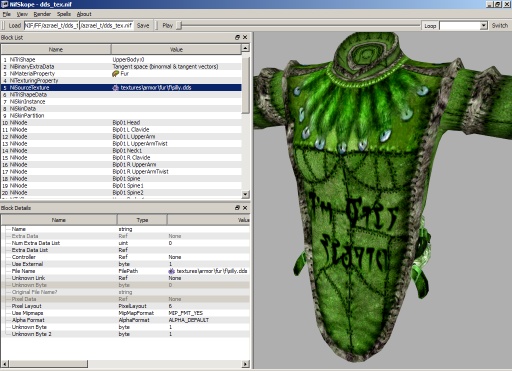
- The purple flower icon I pointed out before is magical. If you click it, the Texture > Choose spell will be invoked! In other words, a standard browse window will appear and you can choose your new texture.
- You should now see your new texture on the 3D model!
- Once you've picked your texture, you may need to fix the path a bit, especially if you haven't set your NifSkope texture folders properly. To do this, double click on the texture path itself; the words to the right of the purple flower. An edit box will appear, allowing you to change the texture path however you like. Press the Enter key when finished.
Some words on the texture path. The general rule is, if you have your texture folders set properly so you can see the textures in the 3D view, and have extracted your textures to a similar folder structure as is used by your game and have stored your new texture there, the flower icon will magically know the proper path to use. However, it does not have knowledge about your game, so if you did anything differently you will have to find out what kind of path your game uses to make sure you're doing it right. The easiest way to do this is to look at the path your changing and copy and paste it somewhere or write it down. If the original path starts with textures\, then your new path needs to start with textures\ too. Similarly, if the original path just contains the name of the texture file and no folder names, that's what your new path needs to do.
Never release a NIF file that has paths starting with the drive letter ( C:\, D:\, etc.). These will only work on your machine or others who have installed the game exactly the same way. Always make sure your paths follow the example of the original paths.
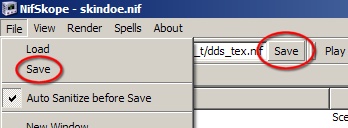
- All that's left is to save the NIF file with a new name. Chose File > Save or click the Save button.
Enabling Alpha † 
Sometimes you want to use a texture that has some see-through parts. Alpha-enabled objects are expensive for the game engine to calculate, so you are required to flag objects that use alpha with a NiAlphaProperty. Each 3D mesh in your NIF file that uses the see-through texture will need to be flagged with this property.
- First, select the object in the 3D view as discussed above in the graphical method. Again, the NiTriShape or NiTriStrips object will be automatically selected in the Block List window.
#ref(): File not found: "Nifskope_change_texture3.jpg" at page "倉庫/海外Site翻訳/NifTools/ChangeTexture"
- Now right-click the selected NiTriShape or NiTriStrips line in the Block List window. The spell menu will appear. There are quite a few spells you can cast on this mesh! The one you want to choose is Node > Attach Property.
#ref(): File not found: "Nifskope_change_texture11.jpg" at page "倉庫/海外Site翻訳/NifTools/ChangeTexture"
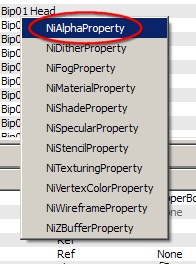
- When you click Attach Property a new menu will appear. This is the list of all the properties that exist. You want to add alpha (transparency or see-through parts), so choose the first one; NiAlphaProperty.
That's all there is to it! A new NiAlphaProperty with default settings will be created and selected in the Block List view. If you want to tweak the exact way that transparency is displayed, you can alter the values showing in the Block Detail window below, but this usually isn't necessary.
So now, all that remains is to repeat the steps above for any other 3D shapes in your NIF file that need to have Alpha enabled, and save the NIF file with a new name.
